How to Find Boost Leaks Before Tuning: DIY Testing Guide
A $20 boost leak can rob you of 50hp and create false knock readings that will send your tuning session completely sideways. The worst part is your ECU will pull timing trying to “fix” knock that isn’t actually happening, leaving you chasing ghosts in the datalog while your car runs like garbage.
- Test at 15-20 PSI (103-138 kPa) with shop air, never exceed your system’s max boost
- Check intercooler piping, throttle body connections, and wastegate vacuum lines first
- Spray soapy water on every connection while pressurized to spot leaks visually
- False knock from boost leaks typically shows inconsistent timing pull across cylinders
- Fix all leaks before tuning, a single connection can cost 10-15% of your power
Boost leak: Any uncontrolled escape of pressurized air between your turbo compressor outlet and intake valves, causing lean conditions, timing pull, and power loss that your ECU interprets as potential knock.
Why Boost Leaks Create False Knock Readings
When pressurized air escapes your intake system, it creates a lean condition that spikes combustion temperatures. Your knock sensor picks up the abnormal combustion signatures and tells the ECU to pull timing. The problem is your AFR gauge might still read correctly at the O2 sensor location, but individual cylinders are running lean based on which intake runners are closest to the leak.
This creates inconsistent knock readings across cylinders that make zero sense when you’re reviewing your datalog. Cylinder 1 might show 4 degrees of timing retard while cylinder 4 shows none, even though they’re seeing identical boost pressure and fuel delivery. You’ll waste hours adjusting fuel maps and timing tables trying to fix what looks like a tuning issue when the real problem is a $3 hose clamp that’s barely finger tight.
The leak also reduces your effective boost pressure, so you’re not making the power you think you are. Your boost gauge might read 18 PSI (124 kPa) at the manifold, but if you’re losing 3 PSI (21 kPa) through a loose intercooler connection, your cylinders are only seeing 15 PSI (103 kPa). That 3 PSI difference can easily cost you 30-50hp depending on your setup.
The Professional Boost Leak Test Setup
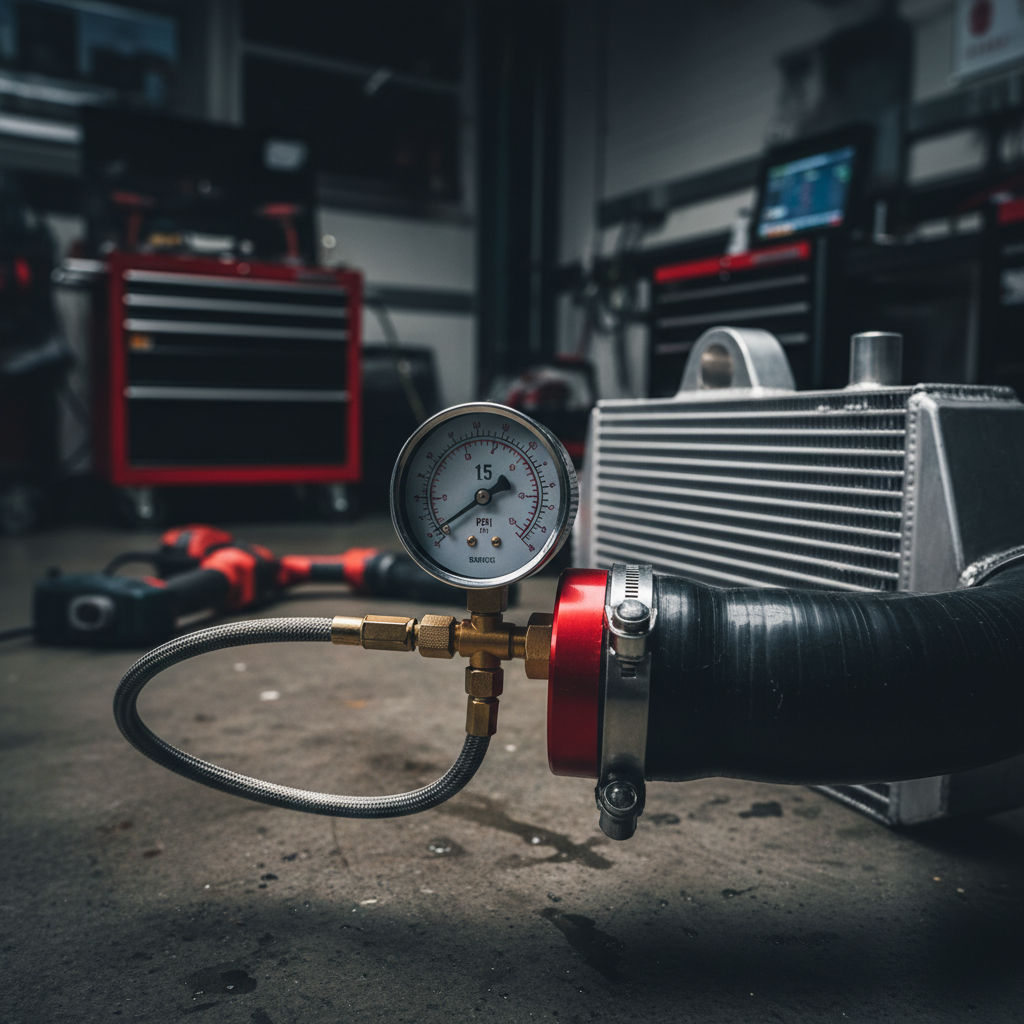
You need three things: a shop air compressor, a boost leak tester, and soapy water in a spray bottle. The boost leak tester is basically a pipe with a ball valve that connects to your throttle body inlet. You can buy one for $50 or make one from PVC pipe and fittings for $20.
Remove your intake tube at the throttle body and connect the tester. Close the throttle blade completely, either manually or by having someone turn the key to the off position if you have an electronic throttle. Slowly pressurize the system to 15-20 PSI (103-138 kPa). Never exceed your system’s maximum boost pressure, you’re not trying to stress test anything.
The key is listening first, then looking. A significant leak will be audible immediately. You’ll hear a hissing sound that points you toward the general area. Minor leaks require the spray bottle technique. Spray soapy water on every connection, joint, and potential leak point. Bubbles form instantly at leak sites.
Start with the obvious suspects: intercooler piping connections, throttle body inlet, blow-off valve connections, and wastegate vacuum lines. Check every hose clamp, especially silicone couplers that can work loose over time. Don’t forget the small vacuum lines, a pinhole in your wastegate reference line can cause overboosting and erratic boost control that mimics a boost leak.
Reading Your Datalog for Boost Leak Symptoms
Before you even break out the test equipment, your datalog can tell you if you have a boost leak problem. Look for inconsistent timing retard between cylinders under the same load conditions. If cylinder 2 consistently shows 3-4 degrees more timing pull than cylinder 1 at the same boost level, you likely have a leak affecting that bank.
Check your actual versus target boost pressure. If your ECU is commanding 20 PSI (138 kPa) but you’re only seeing 18 PSI (124 kPa) at the manifold, and your wastegate duty cycle is maxed out trying to compensate, you’re losing pressure somewhere. A healthy system should hit target boost with 60-80% wastegate duty cycle, not 95%.
Look at your short-term and long-term fuel trims too. If one bank is running consistently leaner than the other, or if your fuel trims are wildly different between low and high load conditions, boost leaks are a likely cause. The leak creates different air-fuel ratios depending on boost pressure, so your fuel trims will swing as boost builds.
False knock from boost leaks also tends to be load-dependent in a specific way. You’ll see clean knock counts at low boost, then sudden spikes as boost builds past the point where the leak becomes significant. Real knock usually correlates with timing advance and tends to be more predictable based on load and temperature conditions.
Common Mistakes That Cost You Power and Time
The biggest mistake is testing at too low pressure. If you test at 5-7 PSI (34-48 kPa) like some guides suggest, you’ll miss leaks that only open up under higher pressure. Most factory boost clamps and connections can hold 5 PSI even when they’re loose. Test at your normal driving boost levels to catch the leaks that actually matter.
Another mistake is ignoring small leaks because they seem insignificant. A leak that only bubbles lightly during testing can still cost you 10-15hp and create inconsistent AFRs that make tuning a nightmare. Every connection should be absolutely sealed before you start adjusting fuel or timing maps.
People also miss vacuum-operated components. Your boost leak test only pressurizes the intake side, but a torn wastegate diaphragm or cracked boost control solenoid can create the same symptoms. These components operate on vacuum and boost reference, so they need separate testing with a vacuum pump or by monitoring their operation during normal driving.
Finally, don’t assume aftermarket parts are better sealed than factory components. Aftermarket intercooler piping often uses cheap silicone couplers and T-bolt clamps that look professional but don’t seal as well as properly torqued factory connections. Always test after any modification, even if the parts are brand new.
Frequently Asked Questions
How much boost pressure should I use when testing for leaks?
Test at 15-20 PSI (103-138 kPa) or your normal driving boost level, whichever is lower. Never exceed your system’s maximum designed pressure during testing. This pressure range will reveal leaks that matter for performance while avoiding damage to seals and components. Testing at lower pressures like 5-7 PSI will miss significant leaks that only open under normal operating conditions.
Can a small boost leak really cause that much power loss?
Yes, even a minor leak can cost 10-15% of your total power output. A 3 PSI leak on a system running 18 PSI total represents a 17% pressure loss, which translates almost directly to power loss on a turbocharged engine. More importantly, the leak creates inconsistent air-fuel ratios that force conservative tuning and timing retard, compounding the power loss beyond just the missing boost pressure.
Why does my knock sensor trigger even when I fix boost leaks?
If you’re still seeing knock activity after fixing boost leaks, check your intercooler efficiency and intake air temperatures. A boost leak can mask an inadequate intercooler by reducing overall pressure and heat buildup. Once you fix the leaks and restore full boost pressure, your intercooler might not be able to handle the increased heat load, causing legitimate knock from high intake temps rather than false readings from lean conditions.
Should I upgrade my intercooler before or after fixing boost leaks?
Always fix boost leaks first. An upgraded intercooler won’t help if you’re losing 20% of your airflow through leaky connections. Fix all leaks, then evaluate your intake air temperatures under full load. If you’re seeing IATs above 60°C consistently, then consider an intercooler upgrade. Testing boost leaks with a new intercooler installed just means you have to retest everything when you install it anyway.
Finding and fixing boost leaks is the foundation of any successful tune. Your datalog will thank you with consistent readings, your engine will thank you with more power, and your wallet will thank you for not chasing expensive solutions to cheap problems. Take the time to do it right the first time, and every modification afterward will perform exactly as expected.